This is adapted from a post I made on tumblr a few years ago in respone to someone asking for advice on drawing clothes. At the time I was recovering from surgery and drawing everything hastily on graph paper. The art is a little rough, but I think the advice holds up. I hope someone finds it helpful!
Clothing is one of those things where I never found a book or tutorial that really “clicked” with me. It’s one of the few areas of art where I feel that it’s fair to say I’m self-taught. Therefore, what follows is my opinion and should be taken with a grain of salt. This is how I draw, not the “right way” to draw.
Drawing clothes is not something fundamental like perspective or rendering where there are “rules” you can learn to guide you. It’s not even like anatomy where there are approaches that have been worked out and passed down by artists over generations. I think about drawing clothing as a synthesis of several different skills- a little bit of anatomy, a little bit of perspective, a little bit of rendering. Perhaps a smidge of graphic design. You’re employing a “cloud” of your artistic skills towards a specific end. What this means is that the TLDR of this post is going to be “do what you would normally do to improve at drawing but apply it to clothing.” So don’t expect something life-changing, instead, open your mind to trying some new things you hadn’t thought of before. Also these tips are geared more toward drawing than painting- that is more about “lines” than “shapes”- but the two skills overlap and the same concepts should be broadly applicable. My examples, however, are drawings.

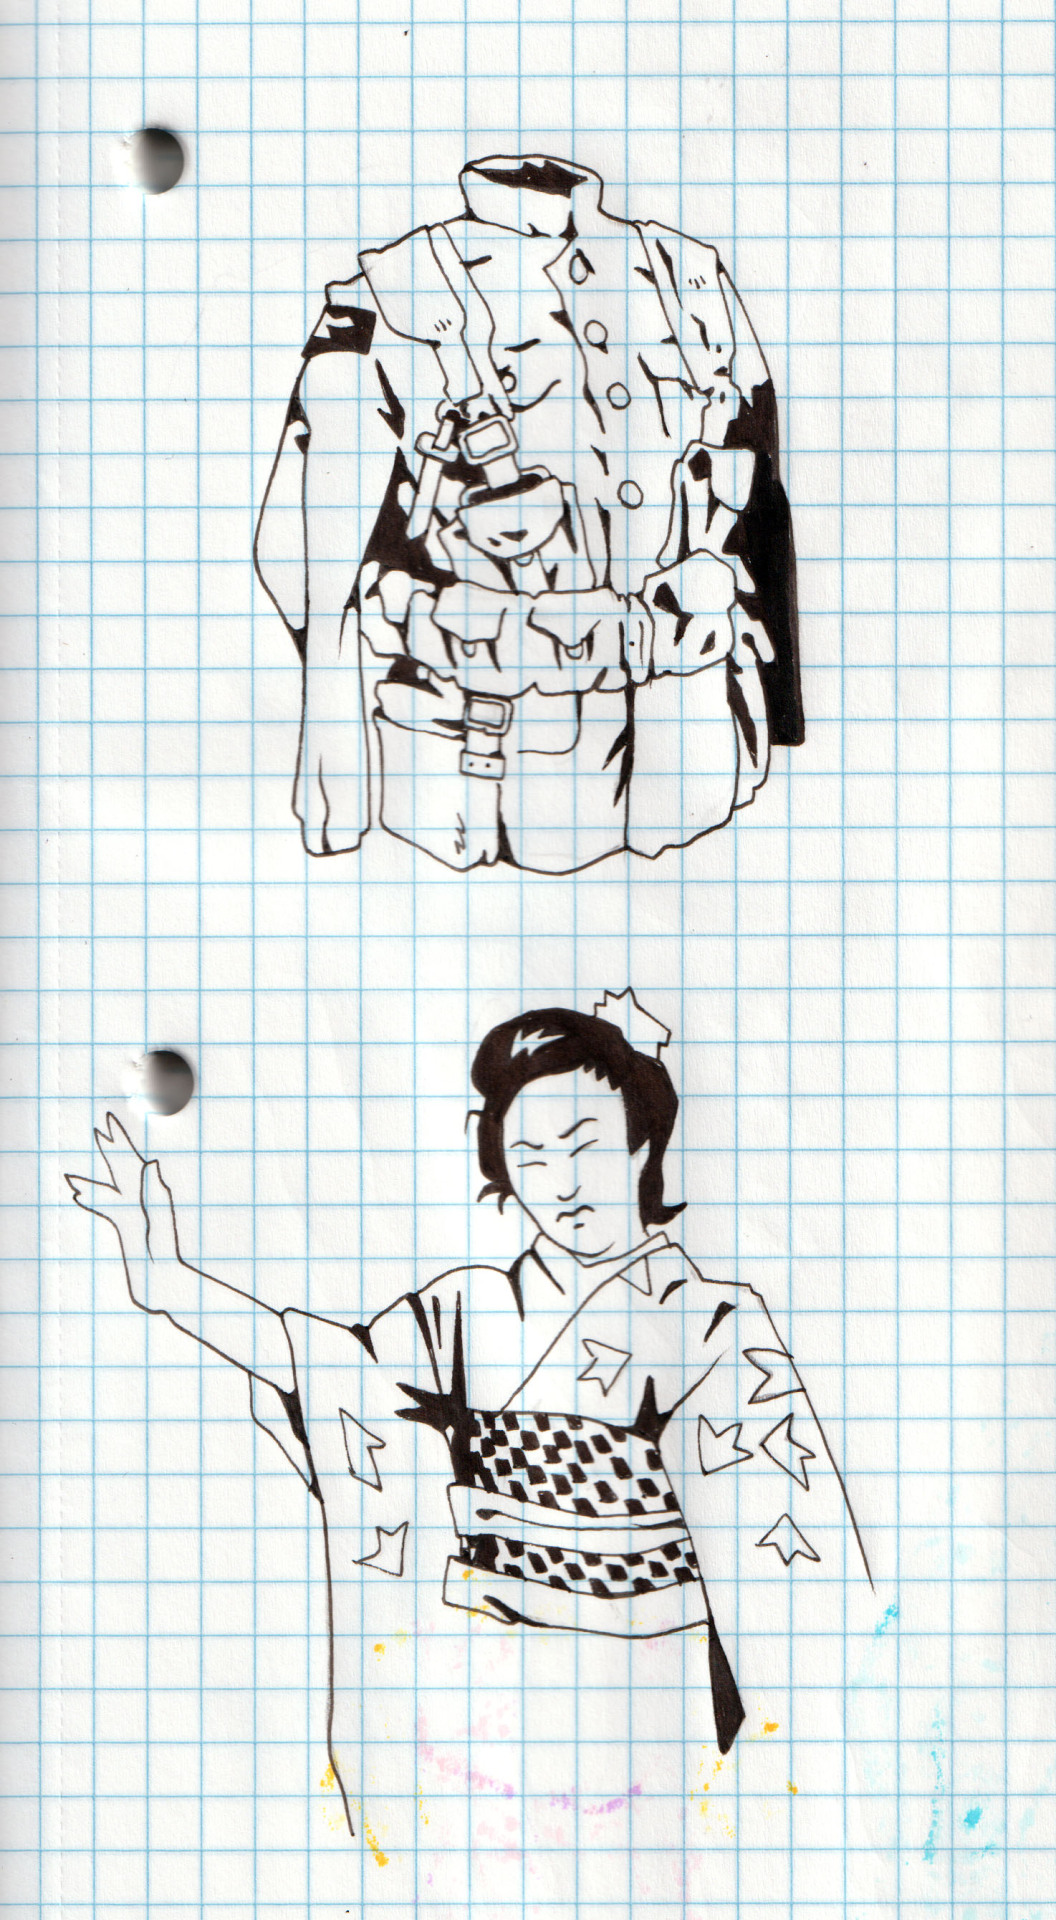
Clothes are mostly tubes of fabric and fabric wants to fall down. The human body and sometimes wind, water and other fluids will stop this fabric from falling down all at once and instead give it a shape. Keep this in mind. It’s helpful to know how clothes are actually constructed if you want to know how they will deform when falling across the figure. Where a garment is simply a length of fabric, it’s very flexible. It can bunch together or be stretched taught. This is most noticeable at the parts of the body that open and shut like hinges- knees, elbows, and armpits. The behavior of garments at these areas of the body is highly dynamic.
At seams where different sections of fabric are stitched together, movement can become more limited. Seams are usually imperfect- pieces of fabric of slightly different lengths might be stitched together or fabric may shrink over time around a thread causing it to pucker and wrinkle. For these reasons, seams often act as the originating areas for folds and wrinkles, even when a garment is not in a particularly flexed/active state.
In a two-dimensional image, it can be helpful to describe a garment in terms of silhouette and wrinkles/folds. The silhouette is the actual boundary of the garment, where the fabric comes to an end. The wrinkles/folds are where different parts of the garment pass in front of each other or where the fabric becomes bunched up to the point that light can’t reach inside and occlusion shadows form. You should always keep the overall silhouette of the garment in mind to inform the bigger shapes you draw, but you will use wrinkles and folds to demonstrate how the garment twists and deforms. These are the basic tools in your arsenal. Keep it simple.
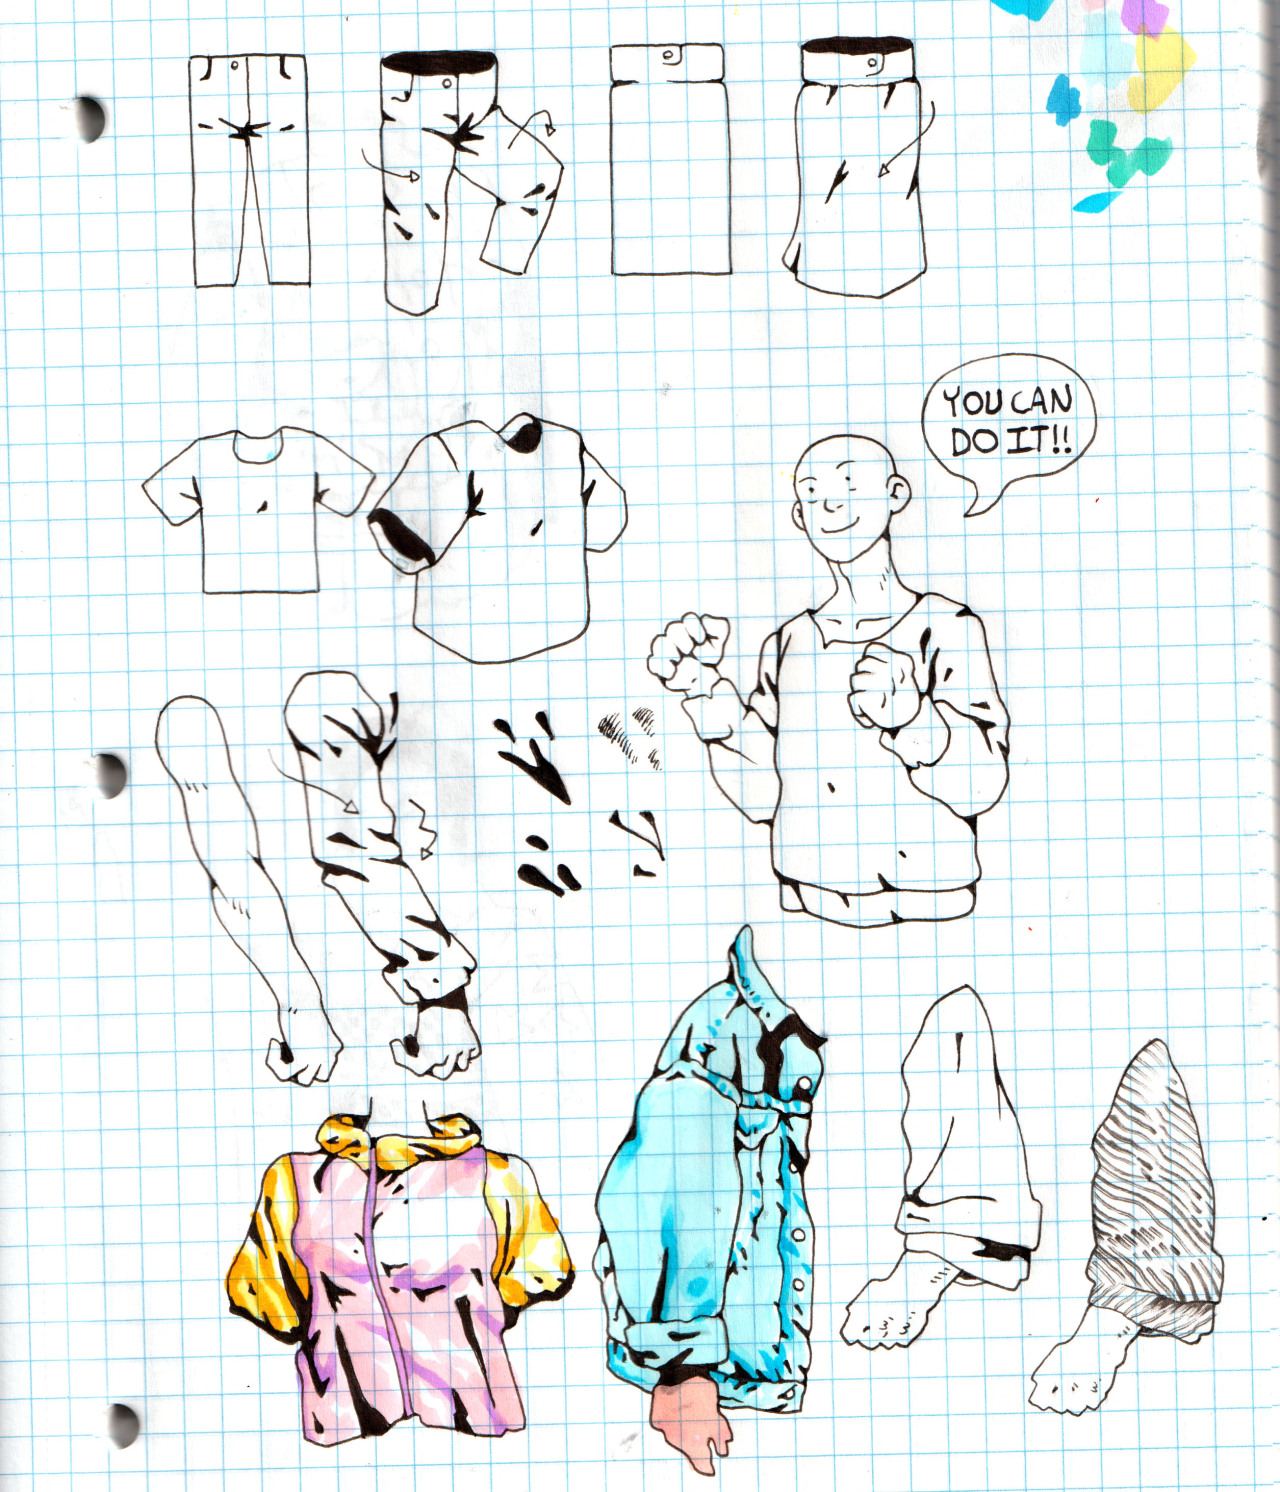
There are lots of different ways to approach wrinkles. My advice and my personal preference is to draw wrinkles as shapes and not just lines. Specifically, tapered shapes (like triangles) can be really good both for implying motion and the varying depth of a fold/wrinkle. Experiment with different shapes of varying angularity, fill texture, etc. Your hands and eyes will guide you towards what looks and feels good. There’s no right way but I would advise you to exaggerate! Ask yourself- what’s the biggest shape I can draw here? How can I twist it to make it bigger, crazier but still describe the form in a way that makes sense? It can be exhausting to try to perfectly copy a reference. Using your imagination like this when doing studies can make the process more fun and will help build up your visual library for when you’re drawing/designing clothing from imagination. In general I would advise you to focus more on drawing something that looks good (i.e. is composed of shapes that you find aesthetically pleasant) than is “correct.”
Quick recap: Garments fall down, you can simplify an article of clothing into a silhouette described by folds and wrinkles. What next? Observe! Take notes! It is worth your time to think about how common articles of clothing are constructed. Jeans, t-shirts, dresses, etc. I used to do some hobbyist sewing and clothing alteration and I think that hands-on work with clothes has really affected the way I think about drawing them. You don’t have to go that far but you can at least look at the world around you. Stuck on the bus, in school, in a meeting, etc? Even if you can’t draw, look at how your pants bunch up around your legs, look at the sleeves of someone sitting next to you. These are valuable observations. Think about how you would draw those things! Really getting good at drawing clothes involves studying them in the wild, understanding how they work, building up your visual library. Look at a faded denim jacket- at the puckered places where the indigo has rubbed away or the permanent creases that hardly see the light of day and remain a deeper blue. Look at petrochemical techwear outfits that break into jagged, high-sheen triangular wrinkles. Soak it all in!
Save pictures of and take notes on outfits you like, designers you like, garments you like. Keep track of these things. Come back and study them over time. Have fun with it! I have folders and folders of images of clothes that I come back to routinely. Over time and with lots of study you’ll learn what you want to draw when you draw clothes and that’s half the battle. You’ll have images of buttons, pockets, belts, laces, fabrics, seams, dancing around in your head that you can deploy at will. It just takes time.